
WordPress Redirects: The Only Guide You Need for Better SEO
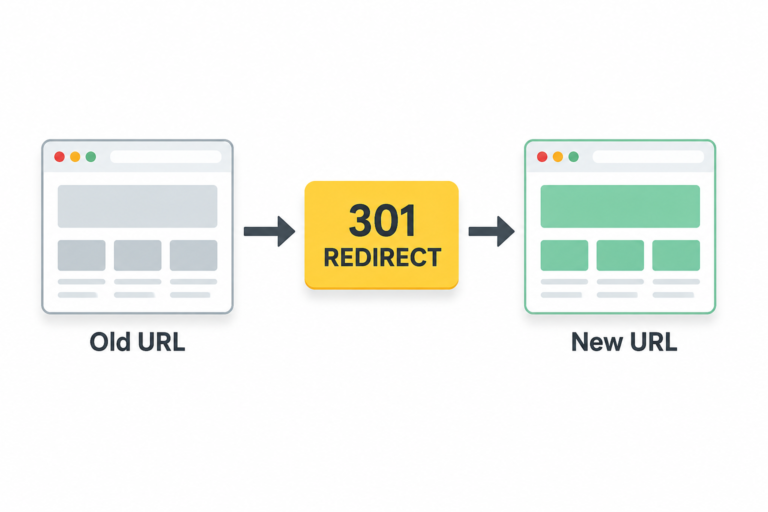
WordPress redirects are like your website’s GPS system. Whenever you move or rename content, a proper redirect steers visitors (and Google) from the old URL to the new one, preserving SEO value and preventing 404 dead ends.
Without redirects, you can lose accumulated link equity and frustrate both users and search engines.
In this comprehensive guide you’ll learn everything about WordPress redirects – why they matter, the different types (301, 302, etc.), how WordPress handles them automatically, and step-by-step methods (plugins and code) to set them up correctly. By the end, you’ll know how to use redirects to keep your traffic and rankings intact whenever you redesign or update your site.
Why WordPress Redirects Matter for SEO
Redirects preserve your hard-earned SEO authority. As SEOPress explains, “Skip the redirects, and you lose all the equity and domain authority that the link had built up.”.
In other words, if you change a page’s URL without a redirect, Google and visitors will hit a dead end. That lost page rank doesn’t magically transfer to the new URL unless you use a redirect.
Similarly, redirects improve user experience – instead of landing on a 404 error, visitors are seamlessly guided to the new content. Think of redirects as traffic signals: they keep people on the right path and prevent the “broken link” chaos that looks unprofessional.
Key reasons to use WordPress redirects:
- Preserve link equity: 301 redirects tell search engines the page has permanently moved and pass most ranking signals to the new URL. This protects your rankings when URLs change.
- Better user experience: Redirects eliminate frustrating 404 pages. SEOPress notes that instead of “frustrated visitors bouncing away,” redirects guide them to the right place. Happy users and Google will stay on your site rather than quitting.
- Maintain site professionalism: Broken links can make a site feel neglected. Redirects keep navigation smooth, which is especially important on high-traffic sites or after migrations.
Remember: Google itself advises using redirects to consolidate duplicate content. If you have multiple URLs with the same info, “try setting up a redirect from non-preferred URLs to a URL that best represents that information”.
In short, proper redirects keep both users and search engines on your side.
Common Redirect Types and When to Use Them
Not all redirects are the same. Choosing the right type is crucial for SEO:
- 301 Redirect (Permanent) – Use when you’ve moved or renamed content for good. SEOPress explains that “301 redirects are used when a page has been moved permanently. They tell browsers and search engines, ‘this page has a new home,’ and crucially, they carry over most of the SEO value.”. Use a 301 whenever you want the new URL to replace the old one in search results (e.g. moving a post to a new slug or domain).
- 302/307 Redirect (Temporary) – Use only if the move is short-term. A 302 (or the HTTP 307) tells Google that the original page will come back. SEOPress warns: “302 redirects… signal that the original page will be back soon, so search engines should keep it indexed.” and cautions “Use these with care, only if you plan to restore the original URL.”. If you only need to point users elsewhere for maintenance, a temporary redirect is fine, but don’t leave it permanently or you’ll dilute SEO signals.
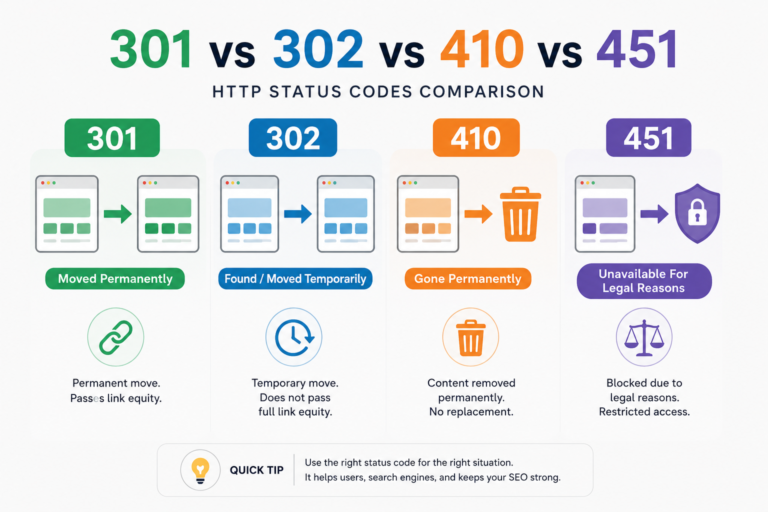
- 410 Gone (Content Deleted) – Use when content is removed and no replacement exists. Instead of redirecting to an unrelated page, a 410 status tells search engines the page is gone and should be de-indexed. Some advanced SEO plugins (like SEOPress Pro) support 410 redirects to clean up deleted content.
- 451 Unavailable (Legal restrictions) – Use when content must be blocked (e.g. age restrictions or geo-blocking). This is niche but supported by Rank Math and SEOPress Pro.
Avoid client-side or meta refresh redirects (they’re less SEO-friendly). Always aim for server-side redirects (HTTP status codes) via your server or WordPress.
WordPress’ Built-In Redirects and Automatic Handling
WordPress actually does some redirect magic under the hood to keep URLs consistent:
- Canonical URL redirects: The
redirect_canonical()function normalizes common URL variations. For example, WordPress will automatically redirecthttp://example.com/hometohttp://example.comif that’s the set homepage, and fix trailing slashes or mixed HTTP/HTTPS inconsistencies. This ensures there’s a single canonical URL for each page, which is great for SEO. (You can disable this if you handle redirects yourself, but usually it helps prevent duplicate content issues.)
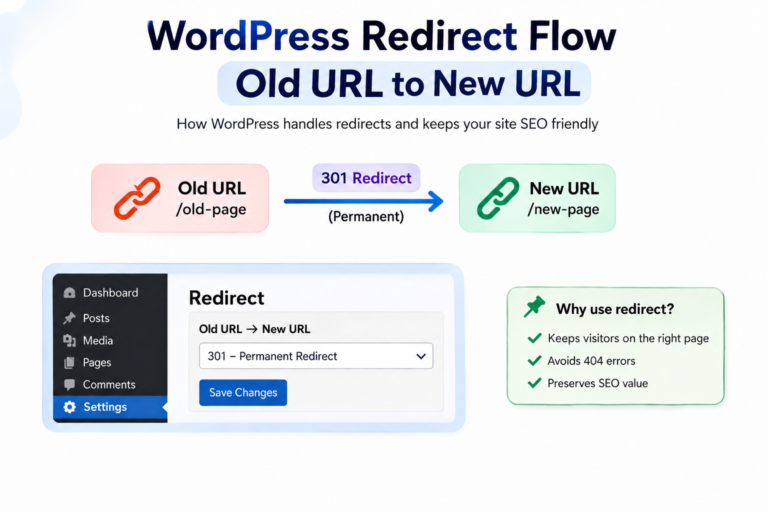
- Old-slug redirects: If you change a post or page slug, WordPress saves the old slug in the database. Then if someone visits the old URL, WordPress auto-issues a 301 redirect to the new URL.
- This is a built-in safety net: “WordPress saves the old slug… If someone visits
/old-slug/, WordPress automatically issues a 301 redirect to the new permalink.”. It preserves any backlinks and SEO value from the original slug. - Note: This behavior can sometimes be confusing if you’re not aware of it, but it’s handy for preserving SEO after minor URL tweaks.
- Attachment and media redirects: Visiting an attachment file’s URL will redirect you to the parent post page by default. This prevents thin attachment pages from ranking. It’s handled by
redirect_attachment().
- Login/Admin redirects: Core functions (
wp_redirect(),wp_safe_redirect()) manage flows like login, logout, or admin dashboard redirects securely.
- Server-level pretty URLs: WordPress also uses server rewrite rules (in
.htaccessfor Apache or config for Nginx) to funnel all requests throughindex.php. This isn’t a redirect per se, but part of how permalinks work.
In most cases, WordPress’ automatic redirects (canonical and old-slug) help without you doing anything. But it’s good to know they exist so you aren’t scratching your head at an unexpected redirect.
For example, if you delete a category or change it, WordPress may redirect old links to the closest match. If needed, you can disable these automatic redirects or override them with custom rules via plugins or code.
Managing Redirects in WordPress: Plugins vs. Code
There are two main approaches to setting up redirects: using plugins (easiest for most users) or manual methods (for developers).
Using Redirect Plugins
For non-technical users, a plugin is usually the quickest, safest option. One of the most popular (2M+ installs) is the Redirection plugin by John Godley. It has a clean interface for adding 301 redirects and even monitors permalink changes to auto-create redirects.
As Redirection’s documentation notes, “redirections are automatically created when a post URL changes”, so you don’t have to tweak .htaccess by hand. Redirection also logs all 404 errors your site generates, so you can fix broken links easily. (Redirection supports regular expressions too for advanced patterns.)
Other SEO plugins include redirect tools as well.
For example, Rank Math SEO and Yoast SEO (Premium) have built-in redirection managers. Rank Math’s redirection module supports 301, 302 and even 307, and can handle regex patterns. Some all-in-one plugins like All in One SEO or SEOPress Pro also offer bulk redirects and 404 logging.
If you already use one of these SEO plugins, it makes sense to manage redirects from there for convenience.
There are specialized plugins too. For example, the WP 404 Auto Redirect to Similar Post plugin will automatically redirect a 404 page to a related post (matching by title or taxonomies) or to a fallback page.
And plugins like All 404 Redirect to Homepage will catch any 404 and send visitors to the homepage, though SEO experts caution that blanket redirects can backfire (more on that below).
Steps with a typical redirect plugin:
- Install and activate the plugin (e.g. Redirection or Rank Math).
- In the plugin settings (usually under Tools > Redirection or Rank Math > Redirections), add a new redirect rule. Enter the Source URL (the old path) and Target URL (the new destination).
- Choose the redirect type (usually 301 for permanent moves).
- Save the redirect and test it by visiting the old URL in a browser. If set up correctly, it should send you to the new page.
Manual Redirects (Code and .htaccess)
If you’re comfortable with code or have server access, you can set up redirects manually:
- PHP (
wp_redirect): In your theme or plugin code, you can usewp_redirect( $new_url, 301 )followed byexit;to send an HTTP redirect from within WordPress. For example, in a template or hook:
if ( is_page(‘old-page’) ) {
wp_redirect( home_url(‘/new-page/’), 301 );
exit;
}
This method requires coding and understanding WordPress hooks, so it’s generally for developers.
2. .htaccess (Apache): If your site runs on Apache, you can add redirect rules in the .htaccess file in your WordPress root. For example:
# Permanent redirect from old URL to new URL
Redirect 301 /old-page/ https://example.com/new-page/
Or using mod_rewrite:
RewriteEngine On
RewriteRule ^old-page/?$ /new-page/ [R=301,L]
These server-level redirects are very fast (they run before WordPress loads) but require FTP or hosting panel access.
3. Nginx Rewrite Rules: If you use Nginx, you’d set redirects in your Nginx config (often via hosting control panel). For example:
location = /old-page {
return 301 https://example.com/new-page;
}
(Check Nginx docs or your host’s guides for specifics).
For most WordPress users, using a plugin is safer and easier. However, if you have many redirects or need very high performance, server-side rules might be best. Whichever method you choose, always test redirects immediately after setting them up to ensure they work correctly.
Common Plugin Features to Consider
When choosing a redirect plugin or tool, look for these features:
- Regex support: Allows pattern-based redirects (useful for bulk changes).
- Logging 404s: Shows which URLs are generating errors so you can fix them. Redirection and SEO plugins offer this.
- Automatic redirects: E.g. redirect when a post’s slug changes (Redirection does this automatically).
- Bulk import/export: Handy if you have many redirects (Redirection can import from CSV or .htaccess).
- Conditional rules: Some plugins let you redirect only for certain visitors (by login status, browser, referrer, etc. – Redirection supports all these).
Using Regex and Bulk Redirects
For large sites or big restructures, you often need to redirect many URLs at once. Manual entry would be tedious. This is where regular expressions (regex) shine.
What is regex? It’s a pattern-matching syntax. For example, you can match all posts under an old category and send them to a new category. WPMarmite gives a handy case study: if you renamed a “/desserts/” category to “/sweet/”, instead of making hundreds of redirects by hand, you can use this regex rule in Redirection (or another tool):
- Source URL (regex):
^/desserts/(.*) - Target URL:
/sweet/$1
This means “for any URL starting with /desserts/, capture the rest of the path and append it after /sweet/”. So /desserts/chocolate-cake will redirect to /sweet/chocolate-cake. After setting Source: ^/desserts/(.*) (and checking “Regex”) and Target: /sweet/$1, one rule covers all posts formerly in “/desserts/”.
Screenshot of the Redirection plugin interface showing a regex pattern (matching /desserts/(.*)) that redirects all old /desserts/… URLs to /sweet/$1 in one step.
Using regex requires some care (one typo and the rule might break). Always test your regex rules on a few sample URLs.
If regex seems daunting, many plugins (and SEO tools) offer “bulk redirect” features. For example, Redirection can migrate old permalink structures: you enter an old pattern and new pattern, and it generates the necessary redirects. This is like using regex behind the scenes.
In summary, regex and bulk-import tools let you handle mass changes quickly. They’re extremely useful during site-wide updates or platform migrations (like moving from Wix/Shopify to WordPress, where URL formats change). Just remember to double-check that the regex doesn’t unintentionally catch extra URLs.
Best Practices for WordPress Redirects
When managing redirects, follow these best practices to maximize SEO benefit and avoid pitfalls:
- Always use permanent (301) redirects for moved content. Unless content is truly temporary, 301s are the way to tell Google the move is permanent. As Google Docs notes, a permanent redirect signals that “the redirect target should be canonical”.
For example, after switching to HTTPS, “always redirect all HTTP traffic to HTTPS” with 301s, or you’ll lose your SSL ranking boost. Similarly, if you change your permalink structure (say from
/?p=123to post-name), don’t make the change live without redirecting – “Changing URLs without redirects destroys existing rankings.”
- Avoid redirect chains. Point old URLs straight to the final destination whenever possible. A chain (A→B→C) wastes extra time and may dilute SEO signals. Google is pretty good at following a redirect, but each hop adds delay. Update internal links and sitemaps to use the new URLs directly.
- Don’t hide all 404s by redirecting them to the homepage. It might seem clever to catch every 404, but SEO experts warn this can confuse Google. One plugin review bluntly states: “It is bad practice to redirect all 404s to your homepage… if a page does not exist, tell the user that.”
Redirecting all 404s can mask real problems and dilute your site relevance. Instead, fix the ones that matter (redirect outdated URLs to relevant pages), and leave genuine 404s alone or serve a helpful 404 page.
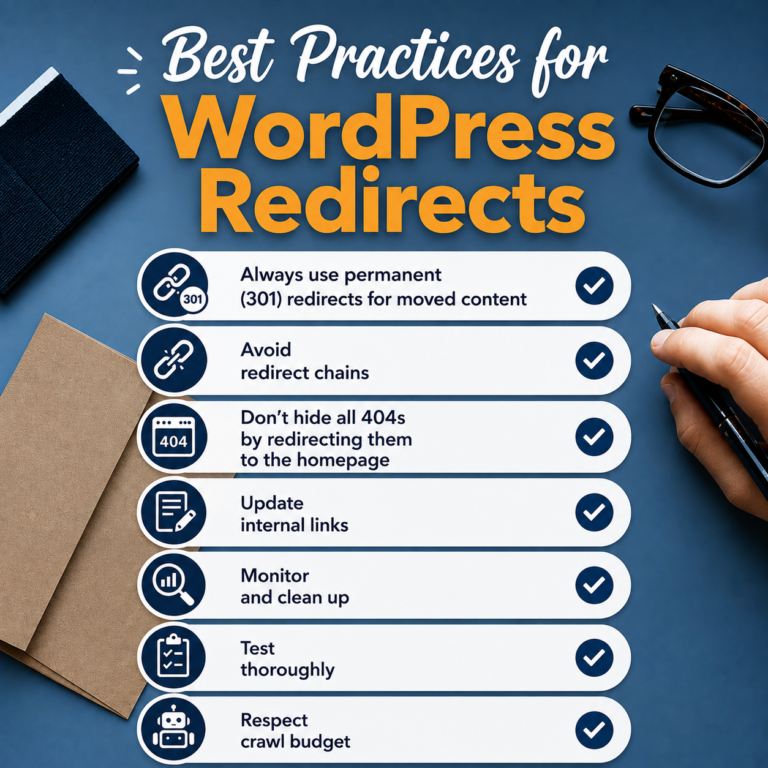
- Update internal links. After moving pages, go through your own content to replace old links with the new URLs. Relying solely on redirects is fine, but updating links prevents unnecessary redirects and ensures future updates won’t break things.
- Monitor and clean up. Keep an eye on your redirect log and 404 reports. Remove any outdated redirects, and fix new broken links that appear. Many SEO plugins (Rank Math, SEOPress) can notify you of slug changes so you can create redirects on the fly.
- Test thoroughly. After adding redirects, test with a browser or command-line tool to verify they return the correct status (301, 302, etc.). Google’s URL Inspection Tool (in Search Console) or online testers can show the HTTP status and final destination.
- Respect crawl budget. For very large sites, unnecessary redirects (especially chains or meta refresh redirects) can waste crawl budget. Use server-side rules and canonical tags wisely so Googlebot spends its time on your actual content, not on redirection loops.
By following these practices—permanent redirects for permanent moves, avoiding needless redirects, and keeping your link structure clean, you’ll ensure your WordPress redirects help rather than hurt your SEO.
Conclusion
Redirects may seem technical, but they’re a crucial part of WordPress SEO. As we’ve seen, using redirects properly preserves your search rankings when you update URLs, prevents lost traffic, and keeps your site looking professional.
We covered how WordPress even handles some redirects automatically, how to create your own (via plugins like Redirection or code), and best practices from Google’s own guidelines.
Remember to use 301s for permanent moves, avoid unnecessary redirect chains, and fix 404s thoughtfully (not by blindly sending everyone to the homepage).
Take Action: If you’re planning any site changes (new permalinks, rebranding, or migration), plan your redirects first. Use a plugin to set them up easily and test them right away.
By handling redirects correctly now, you’ll keep your SEO strong and your visitors happy.
FAQs
What is a WordPress redirect and when should I use one?
A WordPress redirect sends visitors (and search engines) from one URL to another. For example, if you change a page’s address or merge content, you should use a 301 redirect so the old URL points to the new one. This way, you preserve the page’s SEO value. Use redirects whenever you delete, rename, or move pages or posts. Google recommends redirecting non-preferred URLs to a single canonical URL. In short, use a redirect any time a URL changes to keep traffic and rankings intact.
Should I use a 301 or 302 redirect?
Use 301 for permanent moves (when the old page is gone forever). A 301 tells Google to replace the old URL with the new one in its index, passing on SEO value. A 302 (or 307) is temporary – use it only if the original page is truly coming back (like during maintenance). SEOPress advises using temporary redirects “with care” because you might unintentionally keep the old URL indexed if it’s not restored.
Will WordPress automatically redirect old URLs?
WordPress does some automatic redirects. Notably, if you change a post’s slug, WordPress will 301-redirect the old slug to the new one (because it saved the old slug in the database). It also normalizes canonical URLs (fixing www vs non-www, trailing slashes, HTTP vs HTTPS) behind the scenes. However, it won’t handle every custom move (like changing a page’s parent or a whole category). For those cases, set up your own redirects via a plugin or code.
Is it OK to redirect all 404 pages to the homepage?
Generally, no. Redirecting every 404 to the homepage can confuse both users and search engines. Experts warn that “if a page does not exist, tell the user that,” rather than silently sending them to your homepage. Instead, only redirect 404s when there is a relevant replacement page. For others, it’s better to show a helpful 404 page with navigation options.
How do I set up a redirect in WordPress?
The easiest way is with a plugin. The popular Redirection plugin (free) offers a friendly interface: just go to Tools > Redirection, add the old path and the new path, choose a 301 status, and save.
SEO plugins like Rank Math or Yoast also have redirect modules. If you prefer code, you can edit your .htaccess file (Apache) or use wp_redirect() in a custom function. But for most users, a plugin ensures it’s done correctly without touching server files.
A WordPress redirect sends visitors (and search engines) from one URL to another. For example, if you change a page’s address or merge content, you should use a 301 redirect so the old URL points to the new one. This way, you preserve the page’s SEO value. Use redirects whenever you delete, rename, or move pages or posts. Google recommends redirecting non-preferred URLs to a single canonical URL. In short, use a redirect any time a URL changes to keep traffic and rankings intact.
Use 301 for permanent moves (when the old page is gone forever). A 301 tells Google to replace the old URL with the new one in its index, passing on SEO value. A 302 (or 307) is temporary – use it only if the original page is truly coming back (like during maintenance). SEOPress advises using temporary redirects “with care” because you might unintentionally keep the old URL indexed if it’s not restored.
WordPress does some automatic redirects. Notably, if you change a post’s slug, WordPress will 301-redirect the old slug to the new one (because it saved the old slug in the database). It also normalizes canonical URLs (fixing www vs non-www, trailing slashes, HTTP vs HTTPS) behind the scenes. However, it won’t handle every custom move (like changing a page’s parent or a whole category). For those cases, set up your own redirects via a plugin or code.
Generally, no. Redirecting every 404 to the homepage can confuse both users and search engines. Experts warn that “if a page does not exist, tell the user that,” rather than silently sending them to your homepage. Instead, only redirect 404s when there is a relevant replacement page. For others, it’s better to show a helpful 404 page with navigation options.
The easiest way is with a plugin. The popular Redirection plugin (free) offers a friendly interface: just go to Tools > Redirection, add the old path and the new path, choose a 301 status, and save.
SEO plugins like Rank Math or Yoast also have redirect modules. If you prefer code, you can edit your .htaccess file (Apache) or use wp_redirect() in a custom function. But for most users, a plugin ensures it’s done correctly without touching server files.